2023 – My Weekly Project

Week 26 – Flowers in a Jam Jar

I love simplicity. We live in a world where everything is so complex and multi-layered now. As though the “bigger the better” is the order of the day.

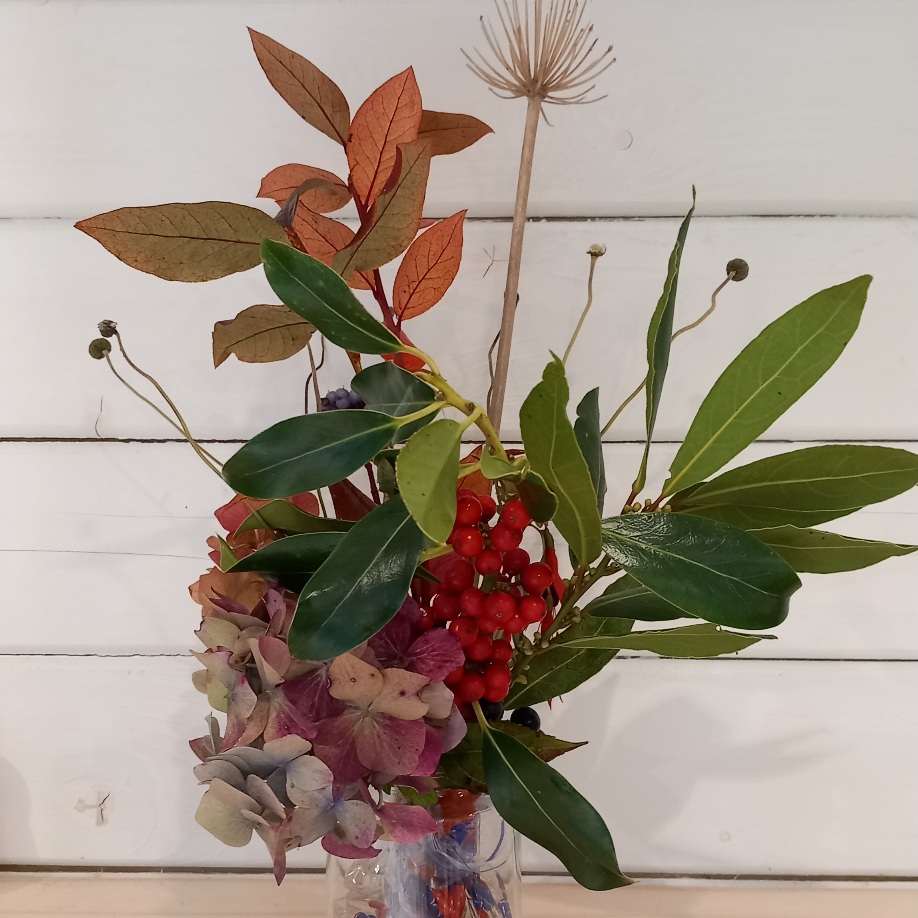
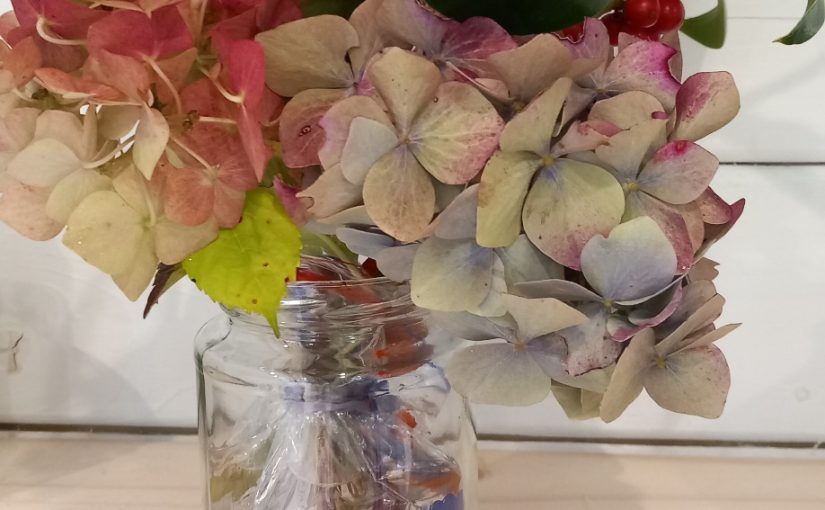
For my birthday recently a close friend turned up on my doorstep with a small jam jar with some flowers in it. Flowers from her own garden – it was so delightful and was placed in the centre of my dining table.

Inspired by a Gift

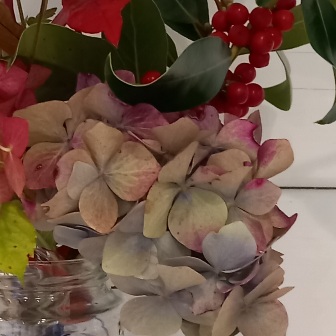
The flowers remained on the table for around 10 days before I had to discard them. The plastic bag containing the water, still had water in it. The jam jar was small but it provided me with the opportunity to use this as one of my creative projects this year.

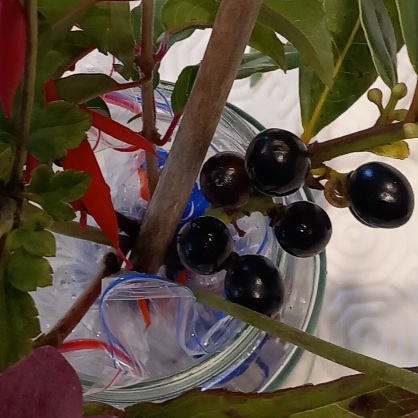
From the garden I sourced some plant life. The plastic bag was reusable, but it needed some fresh water. The rubber band was still OK.

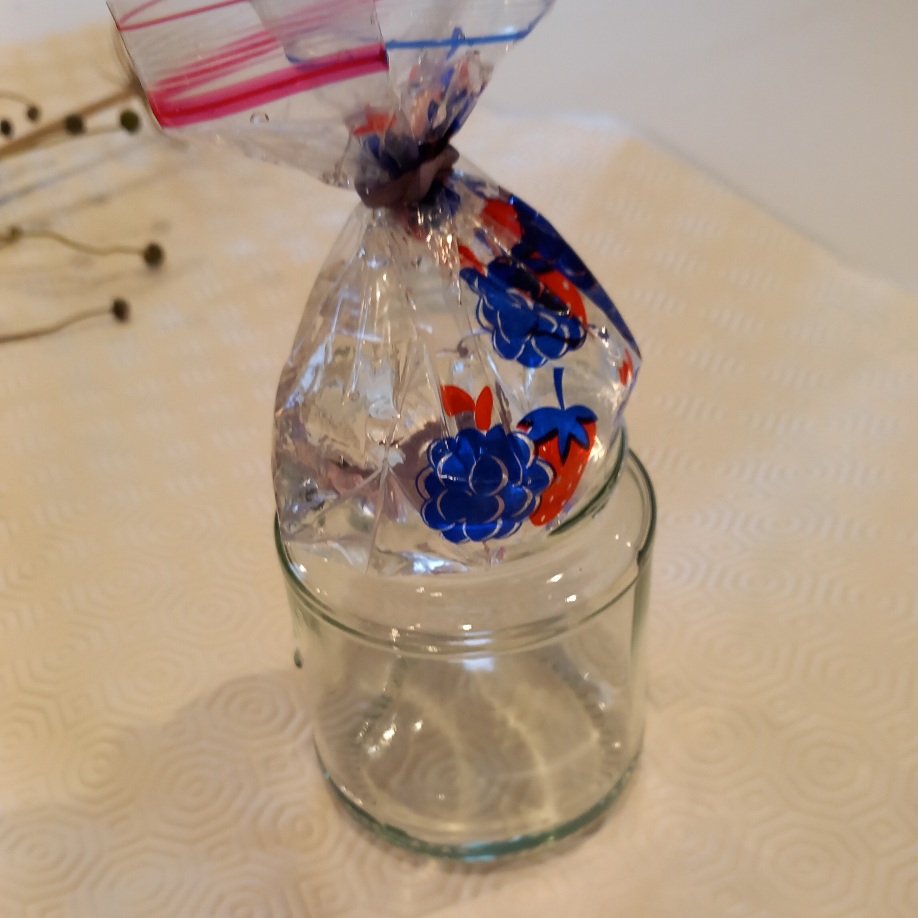
Step 1 – put water into the plastic bag – not too much

Step 2 – put the rubber band around the top of the bag

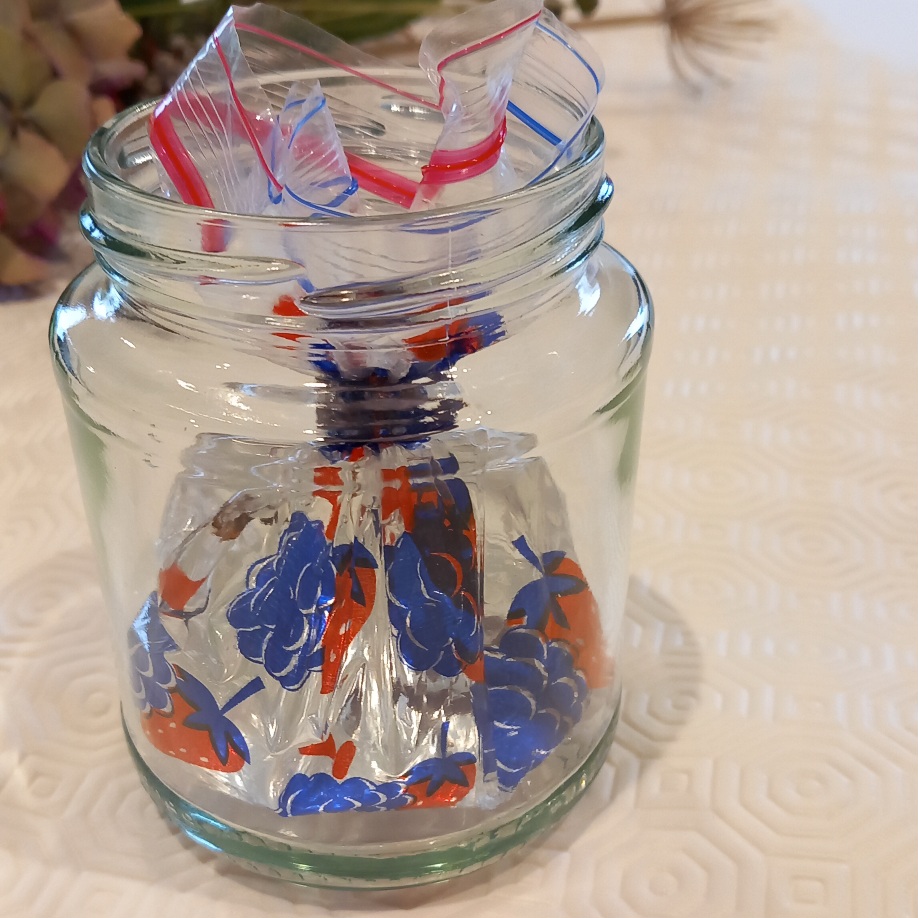
Step 3 – put the plastic bag into the jam jar – carefully

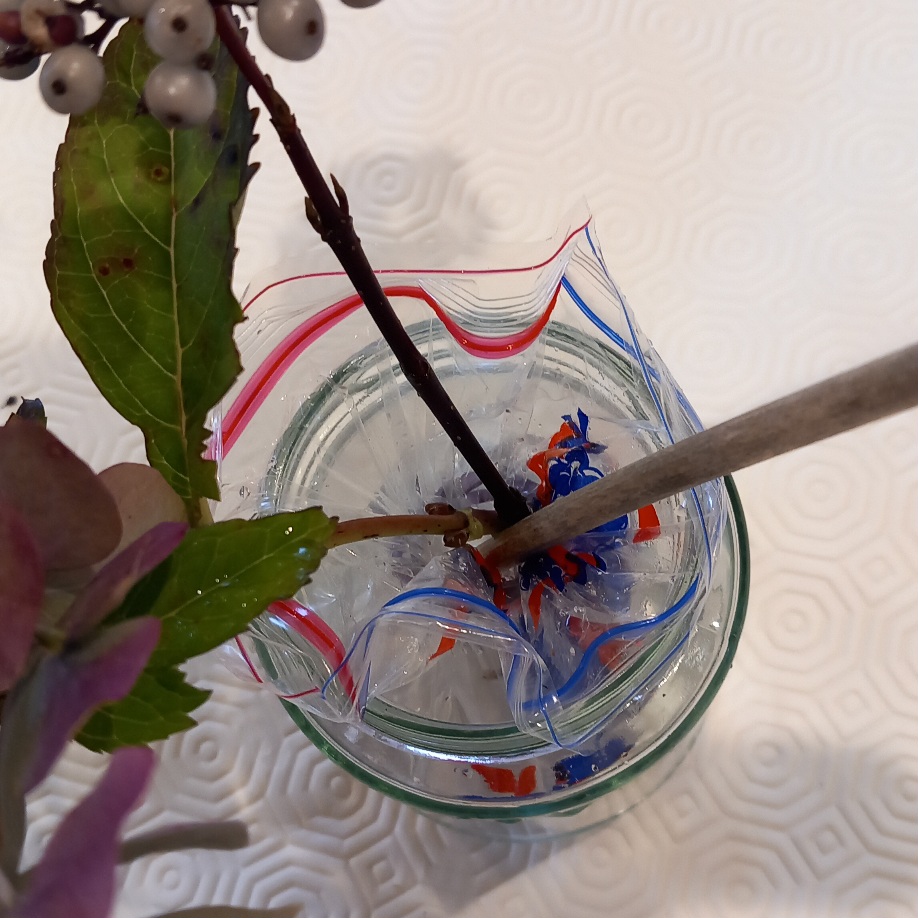
Step 4 – release the rubber band slightly to allow some stretch to put the stems of the plant life into the water

Step 5 – Arrange

Step 6 – Give this to someone or just enjoy it in your own home.
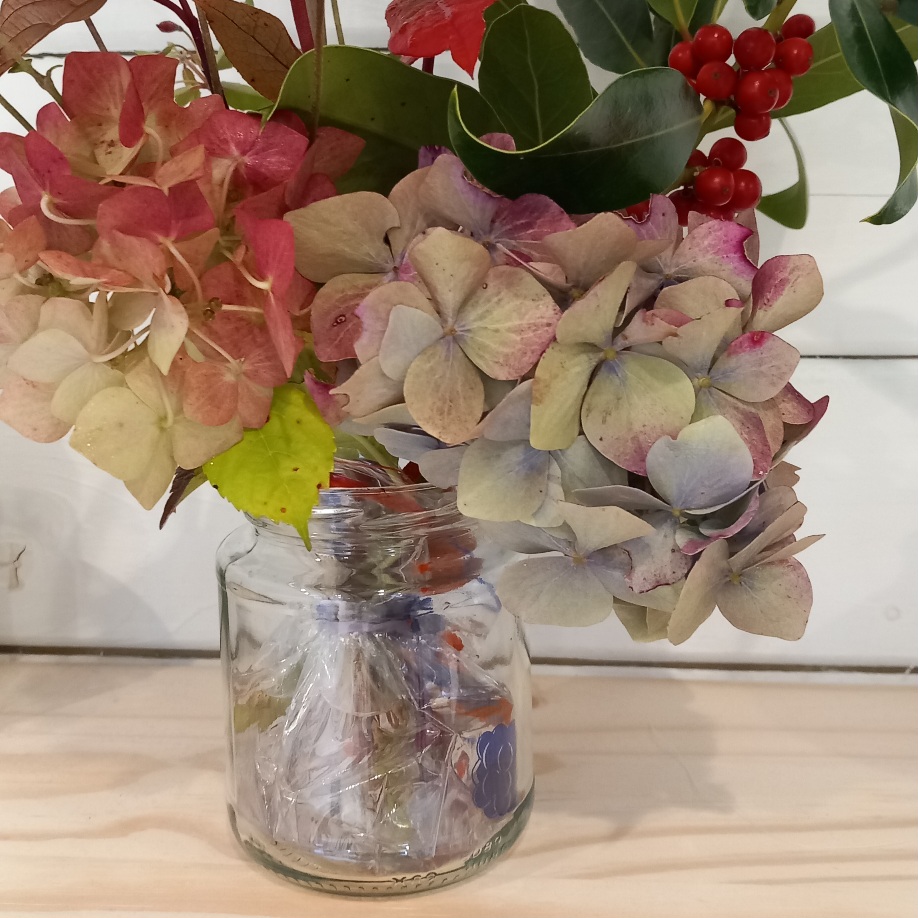
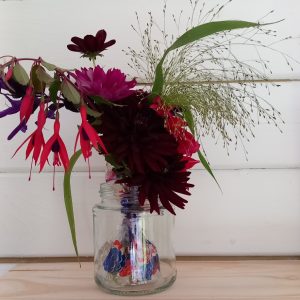
A Simple Display

A small display of flowers like this uses less water. There is no spillage as the water is securely held in the plastic bag. The rubber band also acts as a support for the stems. And you can be wonderfully seasonal without taking too much from the garden. A great way to bring a little of the outside indoors – even more important now as the season begins to change and the days grow shorter and darker.

2023 – My Weekly Project

Week 25 – Don’t throw it away!

De-cluttering is good for us. But it has to be done in the right way. Just like you, I too have a collection of “things” that might come in handy one day. So whilst sorting out I came across a mirror. My first thought was to take it to the household waste and recycling centre. Then I had a better idea.

I had recently given my studio a coat of timber treatment in preparation for the winter months and I had an insect box in need of a new location. So I paired up the mirror with the insect box on the studio wall facing the garden.

A Reflected View

The mirror has been in situ for a month or so now and I have enjoyed catching glimpses of the garden reflected back from it. In an odd way it made me engage more fully with the ever changing scene of the garden in a different way.

Last week an opportunity arose to obtain some more mirrors – unwanted and with nowhere to go. So I brought them home and with a helping hand from my husband they too have been added to this side of the exterior wall of my studio.

Alfie, the cat enjoyed helping us too.

Snippets of the Garden

The mirrors have given me altered views of a garden I know so well. By moving myself around the mirrors the reflected view is constantly changing. I am so pleased with this and now I would like a blackboard to go in the vacant space on the left-hand side. Unless something else comes along looking for a new home in the meantime!

Re-Using Something in a Different Space

Not throwing away that first mirror has given me so much in return for a very small amount of time and effort. And a few mirror plates of course. So next time you are thinking about discarding something just take a moment to think about where else it could live. So much to gain from one little idea.

2023 – My Weekly Project

Week 24 – A Textile Wreath

I have accumulated so many pieces of “useful” fabric over the years. Many of which are packed away as I cannot bring myself to throw them away. Often they are small pieces.

Earlier in the year I did an experiment to make a textile wreath. I sourced the double ringed frames used by florists. I selected 4 different types of fabric and began the process of cutting them to length and attaching them to the frame. And this is what I made:

Improved Learning and Technique

The wreath making gave me the confidence to lead a workshop recently in Helston. I prepared lots of lengths of fabric and enabled others to mix the colours and textures.

Reviewing the making process afterwards for myself I decided to have another go using some lovely fabric I had been given and for which I could not find a use.

Again I selected four fabrics and cut them into strips of 1.25″ (3cm) width. The strips were then cut into lengths of 6.5″ (16cm) and then the ends were finished with either a diagonal or pointed finish. The lengths were tied with either a double or single knot depending on the thickness of the fabric onto the wire frame. I worked around the frame using colour 1, colour 2, colour 3 and then colour 4. This was repeated throughout the frame.

A Happy Joyful Wreath

I have enjoyed making this wreath. I put together colours and fabrics that I would not usually pick up. But when put together they have created something which makes me feel happy. Not just visually but also because these fabrics have not been wasted.

It is time consuming. But look at what I have created. Once piece of advice I would give is to keep the pieces of fabric close together on the frame. Once tied on and tightly packed they will not come off.

I put a length of fabric onto the outer edge to form a “hanging hook” and now this will take pride of place in my studio. I am probably going to make another one as a Christmas gift, but one which can be displayed and enjoyed all year round by someone.

2023 – My Weekly Project

Week 23 – Origami

There is something magical about taking a piece of paper which is 2 dimensional and with a few folds turn it into a 3 dimensional object. The wonderful thing is that you don’t have to invest in expensive paper, tools or equipment.

Sourcing Paper

While I was doing some sorting out recently I came across a copy of The 20th Century Art Book. A heavy volume with a plentiful supply of great art images. The pages are almost square in format. It was a book I no longer had a use for and it would have gone to the local charity shop or telephone box book exchange. But with origami on my mind it was an obvious choice to use some of the pages and see what happened.

I found the paper thicker than expected and as I began to make my initial folds I was unsure how successful it would be. But I had made a start and I just had to keep going.

How to make an Origami Crane

Following on from some research I decided I wanted to make cranes. The crane, or orizuru as it is known in Japan, symbolises hope and peace. It is also regarded as the “bird of happiness” in Japanese culture.

There was no shortage of instructional material and videos to guide me through the folding process. This video was excellent and after two or three viewings accompanied by my piece of paper I felt confident to continue by myself. I could not help but notice the attention given to the accuracy of folding neatly into the corners.

Here are some images of the stages of my folding and making.

Repetition

Repeatedly making the cranes was very relaxing. Using paper with different images on it make the outcome always a little different. My skills of folding and paying greater attention to the accuracy of each fold improved as I made more and more.

As a result of this week’s challenge I have been asked to do a session for a local community group later in the month. I will need to perfect my techniques even more now. I can then enable everyone who attends to get the most out of the workshop and hopefully be confident enough to make some more when they go home.

All of the cranes are now hanging in my studio and have made a welcome addition bringing peace and happiness to my working environment. I admire them every morning when I walk in.